I ordered this set of Regimental Advisors through an independent Tabletop Hobby store. Although I saved a few bucks, it took a month to be delivered, so I won’t be going back to them.
After reading about the Regimental Advisors in the Codex and some tactics blogs, I decided I had to have them as options to add to my Company Command Squad.
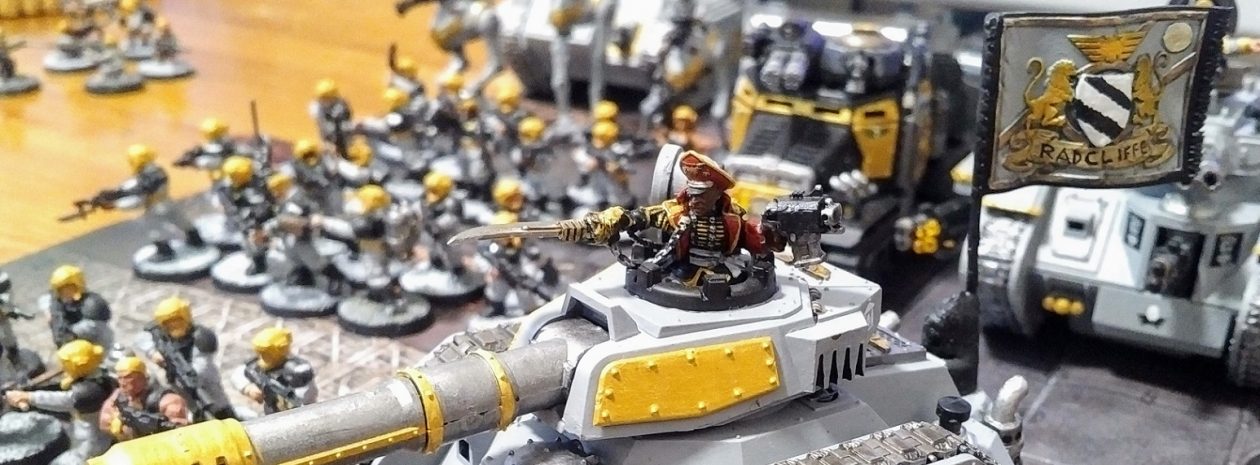
Regimental Advisors in the back row flanked by a command squad and Basilisk
Astropath
I feel like I’m going to add this character to my Company Command Squad (CCS) in every game I play. He’s the cheapest psyker in the game at only 25 points, easy warp-charge points. And he generates his powers from Telekinesis discipline which the Primaris Psyker can’t.
My Astropath Regimental Advisor
Master of Ordnance
The Master of Ordinance (MoO) is an interesting character. He’s a T3 single wound character for 20 points. But, he has the ability to call a S9 AP3 Large BlastBARRAGEattack down anywhere on the board. The problem is it’s likely to scatter 3D6″! And since the attack counts as Ordnance, he has to remain stationary. A odd tradeoff, but could be handy for a static CCS.
Master of Ordinance on the back of a Basilisk (being blinded by my camera’s flash)
Master of Ordinance on the back of a BasiliskMaster of Ordinance on the back of a Basilisk with a command squad in the foreground
Officer of the Fleet
The Officer of the fleet (OoF) is character I don’t plan on using, but I’m glad to have.
Upon passing a leadership test, this character improves your reserve rolls by one (so 3+ on a D6), or reduces your opponents reserve rolls by 1 (5+ on D6). This is stack able with other modifiers like a Comms Relay, Emperor’s Tarot, or another Officer of the Fleet. I don’t think this is all that great, especially since the leadership test will only be successful about 50% of the time for this character.
However, from the moment I saw this model, I knew how I wanted to paint him. I hope it’s painfully obvious.
My officer of the fleet. I hope you can recognize his resemblance to a certain Starfleet Officer (hint, see vessel in the background)
Uses and Tactics
I was planning on usually having my CCS in a Chimera, which is fine for protection, issuing orders, and firing a witchfire power. However, if the tank moves at all that turn, it eliminates the ability for my MoO to fire.
Alternatively, I may have my CCS stationary hiding in cover or behind a blob squad. In that case, I’ll either have to be strategic about being stationary, or make use of a trick like the “Forward For The Emperor” order or hope my warlord rolls “Relentless” to make use of the MoO’s attack.
Leman Russ Battle Tank parts, still on sprue, but primed skull white
The Leman Russ is a given because it’s so iconic for the Astra Militarum. Reviews from Grumpy Guardsman and Imperator Guides say the Leman Russ Main Battle Tank (MBT) is too expensive and ineffective because of the ordnance rule. I agree, but it is a nice ‘generalist’ for my first Leman Russ. I expect it’s S8 AP3 will be great for chewing up Space Marines. And, I can modify it like the Basilisk for lights and sound, which is a big plus!
I really like the Schaefer’s Last Chancer’s models and am looking forward to painting and using them. I plan to organize my Cadian models as a platoon from now on, and I wanted some models that distinctly looked like veterans. So, this set of the “Last Chancer’s” looked perfect. A nice treat is that the set includes a meltagun, heavy bolter and missile launcher. I plan on fielding them as “melta-vets” in a Chimera, and some as my new Command Squad.
Ogryn I plan to field as special character Nork Deddog
I don’t have any fluffy special characters, and reading the Codex I decided I wanted Nork Deddog. In my previous battles, my Command Squad has been devastated by close combat. This big, tough, angry Ogryn should act as a good deterant or measure for fighting back!
I don’t like the new Ogryn models, so I was very pleased to get a good deal on this older version of Nork on eBay.
Servitor with servo arm
Servitor with servo-arm
Servitor with Heavy Bolter
Servitor with Heavy Bolter
Since I plan on fielding a rather tech/mech heavy army, a Techpriest and some servitors are practical and appropriate. Some dislike them as not useful or cost-effective. But I like the idea of Techpriest repair rolls being more effective. Further, for 10 points you essentially get a guardsman wearing carapace armour armed with a power fist! Not a bad deal. And two of these servitors I ordered have heavy bolters, which will give them some punch in the backfield and overwatch protection. I’m looking forward to fielding the squad of 5.
Old 90’s stormtroopers
The old stormtroopers are an oddball but I like them. I have a squad of old 90’s stormtroopers which I’ve fielded a few times. But they’re a different colour scheme and hard to field because of the heavy bolter and plasma gun. These additional 5 models give me some flexibility. I can run 9 lasguns or modify one to have a plasma gun and run “plasma vets”. And more importantly, I can try out the new paint colour scheme on them.
Rhino as it arrived
This Rhino is a bit of an oddball. It’s not an Astra Militarum vehicle. However, it could be a Space Marine Rhino to go with my Imperial Fists or as a transport for my Inquisitor. In fact, I’m tempted to modify it a bit and field it as a Razorback for additional mechanized punch. We’ll see how it goes.
This pile should keep me busy for a while! Lots of fun to come!
This chimera is one of the oldest models I own. I bought the kit for this Chimera at the Grand Opening of the Games Workshop at the Eaton’s Centre in Toronto around 1998. It’s one of the few times Warhammer models were all discounted! The store has since closed, but I still have the tank and treasure it.
Chimera “Eaton” before its update
The paint colours reflect the colour scheme I had for my Imperial Guard forces at the time: Black with blue and red trim.
Old Imperial Guard models whose uniforms inspired the old colour scheme for Chimera “Eaton”
My new forces have a distinctly different colour palate. My new infantry models are grey with black and gold trim. I will probably get around to re-painting those old models too, but my mechanized army made me prioritize getting the vehicles up to spec more quickly.
Rather than re-painting the black hull Administratum Grey to look like my other Chimera, I decided to flip the colours a bit. I left the hull black, and gave it gold and grey trim. And I’m really happy with the result!
Chimera “Eaton” with its new paintjob
Chimera “Eaton” with its new colours, side view
Nameplate of Chimera “Eaton”. It says “Espandor VII” in a highly stylized font. I don’t remember what that was supposed to mean, but I decided to leave it.
I found that the gold on black looked really, really sharp. I’m tempted to paint others to look like it, but then I decided this should be a special tank.
The only physical change I made was to switch out the pintle-mounted storm bolter with a heavy stubber. Most tactics I’ve read suggest the heavy stubber over the storm bolter. They’re the same points, and although the heavy stubber is weaker and has a poorer AP, it fires 3 shots instead of 2, which is really important, especially if snap-shooting.
Chimera Eaton Before(left) and After (right)
I’m glad to (re-)introduce Chimera “Eaton” with its new colour scheme. I plan on using it as a stationary “pillbox” for a command squad. That way they are kept safe, the commander can still issue orders, and the tank can fire all of its weapons with full ballistic skill.
I first mentioned my new Basilisk in this post. This has by far been my favourite model to build so far.
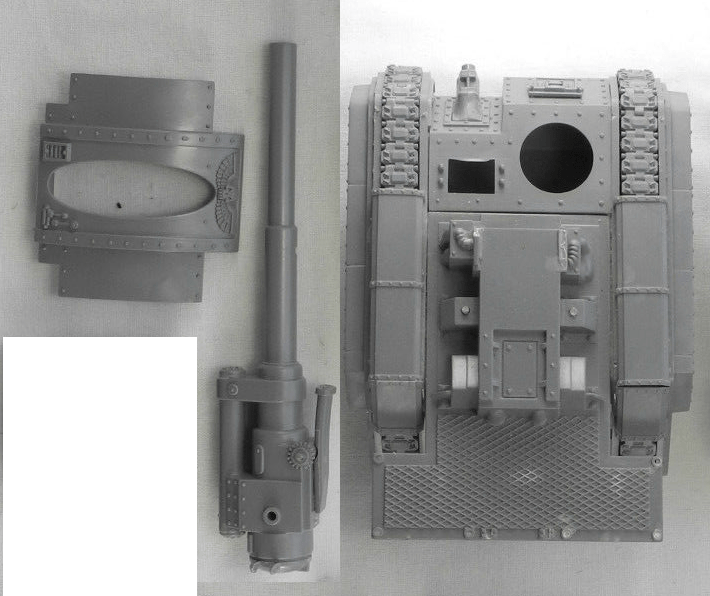
Basikisk parts as they arrived from the eBay order: Partially assembled and unpainted
Partially assembled Basilisk
As I mentioned in this post, the parts weren’t complete so I had to partially disassemble and re-assemble the Hellhound and Basilisk so that there would be enough parts for both. Part of the puzzle was that they supports for the Basilisk’s Earthshaker Cannon weren’t included. So I improvised using some spare parts.
After I started painting, I realized I wanted to do something special for this tank. The Earthshaker Cannon is so iconic of the Imperial GuardAstra Militarum that and unsubtle that I felt it needed something. I wanted to make it something I would be personally proud of. And that meant going back to my Engineering roots and adding some electronics and circuitry.
I wanted to make the gun light up and make sounds. The simplest way to do this would be to scavenge the speaker, light, battery and control circuitry from a Dollarama Toy Gun. I got the below toy for $3 (plus tax).
Dollarama Toy Gun that was scavenged for parts
I must admit, I had a lot of fun exploring the device. It was kind of like an autopsy or a dissection of a mysterious object.
Dismantled toy gun showing speaker, integrated circuit, vibrating motor, light, and wiring
Taking it apart, I discovered it wasn’t very complicated. There was a tiny integrated circuit that handled the noise generation. Connected to the circuit was a simple speaker and a LED. There was also a motor that made the gun vibrate. I wanted to use that to make the tank shake, but it was pretty bulky and heavy.
Detail of internal parts of Toy Gun
Toy gun’s integrated circuit I scavenged for the lights controller and sound
I decided I wasn’t going to use the vibrating motor thing. But the light and sound were very necessary and I was looking forward to using them.
Simplified circuit of lights and sound for my Basilisk tank
Actually fitting the electronics into the tank was trickier than I expected. The inside of the tank is actually quite small, so there isn’t much room to work with.
The tank came mostly assembled from the person I purchased it from on eBay, so I actually had to break the tank apart to get inside.
Disassembled Basilisk Tank
I mangled the battery holder from the toy gun and shoved it into the tank. The batteries are surprisingly bulky! At the same time, I slid the speaker into the forward section below the ‘hatch’, positioned the integrated circuit chip behind the battery, and made sure that the control wires and LED light were free to reach the outside of the tank.
Crafting the battery holder and other parts into the inside of the tank.
I punched a crude hole int he top of the tank so that the light and control wires would come out. The idea was that the wires would come up just below the Earthshaker Cannon so that they could go into it with minimal distraction.
Crafting station
The LED went into the cannon from behind, and I installed a momentary pushbutton on the back of the cannon. I rather like the way the barrel of the cannon lights up!
It lights up!!
After all that fancy assembly, I needed to finish the paint job to make it presentable. It’s mostly just Administratum Grey with Auric Armour Gold highlights, like the rest of my army. However, I’m proud of how the wash on the skulls and wings on the top of the guard turned out.
New basilisk, front viewNew basilisk, left side view. You can see the pushbutton on the back of the cannon.New basilisk, rear view. The pushbutton doesn’t stand out much, which was the idea.
New basilisk, right side view
Why did I name this tank Bertha? Well, it’s a very unsubtle tank, so I thought it deserved an unsubtle name. And, there’s the historical Big Bertha.
I really enjoy that it’s an ‘active’ electronic model. I plan to incorporate electronics of some sort into future tanks.
My biggest regret is probably that the battery is inaccessible inside the tank. Changing the batteries is all but impossible, and I’m worried about a leak eventually. It’s something I’ll keep in mind for future projects.
Basilisk Tactics:
Both Grumpy Guardsman and Imperator Guides agree that the Basilisk is iconic but not particularly competitive. The main blast is a very impressive S9 AP3 large blast. However, the barrage rules give it lots of trouble. Its minimum range is a whopping 36″ which means it can’t use the Barrage rule within that distance. And scattering 2D6-3″ means it’s pretty likely to miss its target.
Another new tank from that big eBay purchase all those months ago. It started like a a Chimera manufactorum, but I’m starting to make my way through the backlog and starting to field an army of tanks!
My tank factory (or Chimera Manufactorum). Most of these tanks are finished now
I’ve already published posts about my new transports Taurox “Lechon” and Chimera “Dauntless“. Today’s post is about my first non-transport tank: A Hellhound I’ve named “Cerberus”.
Construction
Just putting this together was a bit of a puzzle. The eBay package I bought of 3 tanks wasn’t exactly complete. The model that I assume was supposed to be the Hellhound was missing several tank track links. To remedy that, I pulled the track covers off of the Basilisk model and used them to cover the gaps in the tracks of the Hellhound. I have to admit that putting this puzzle together was pretty fun!
Unassembled parts of original Hellhound (left) and Basilisk (right). I moved the track covers from the Basilisk to the Hellhound to cover up missing tank track links.
There were other pieces missing like the top hatch and front window. I cut up a random piece of plastic to simulate the top hatch and used some liquid green stuff to fill in the gaps. For the front hatch, there was a mount for a heavy bolter in the Chimera kit which I wasn’t using. It looks like a sensor array in the front, which I rather like.
It wasn’t fun to clean up the mess of glue. The model seemed to be covered in a lot of cheap glue, perhaps even from a hot glue gun. I think I chipped off most of it.
Painting
I stayed with the same grey, black and gold colour scheme that I’ve used on my infantry, chimera, and taurox.
Work in progress on Hellhound
To make this vehicle unique, I freehand painted some flames on the front and on the back door.
First layer of flame detailShowing flame detail (and some liquid green stuff filling holes)
The tank commander kind of came together by accident, but I really like how he turned out. I used a head leftover from my Taurox kit. I think it was meant for the driver if it was a Taurox Prime driven by a Tempestus Scion with the gasmask. I also gave him a baton from the Command Squad sprue.
Tactics:
I followed the advice of Grumpy Guardsman on this post and equipped my Hellhound with a multi-melta. It is one of the few ways Astra Militarum can field this powerful weapon. However, I’ve used it in a battle already, and the BS3 of the hellhound makes it rather unreliable to hit.
I can also field this as a Devil Dog where the main gun is a 24″ blast melta. That would make quite a tank hunter!
I have parts to make a second one, so I’ll probably follow Imperator Guides’ advice and make one with a hull flamer and a pintle-mounted heavy stubber. Being a fast vehicle I can fire two weapons at once, so if the hull heavy flamer is out of range I can still use the heavy stubber.
Name Origin:
I thought of a few different names, and Cerberus is the one that stuck. From Greek and Roman mythology, Cerberus is the name of the eponymous Hellhound of Hades. It’s also the name of a somewhat sinister organization in the Mass Effect series of games.
Another addition to my mechanized army: A new Chimera!! I got it from an eBay purchase several months ago. It was completely un-assembled when I got it so it was fun to put together.
Partially completed Chimera
I originally thought of giving it white “Tiger Stripes” but it didn’t look very good, so I went back to the matte grey like the rest of my army.
I also made a conscious decision to keep it as simple as possible. The base model is 65 points so I left it at that. It’s a fairly versatile tank like this because it already includes a searchlight and smoke launchers. I can always add more features later.
Chimera “Dauntless”. Front view
Chimera “Dauntless”. Detail of nameplate
Chimera “Dauntless”. Side view
Chimera “Dauntless”. Rear view with guardsman exciting the hatch
Chimera “Dauntless”. Rear/side view with guardsman and Techpriest
Chimera “Dauntless”. Front View
Chimera “Dauntless”. Detail of “Tank Commander”
As you can see in the below photos, even though the design of each vehicle is quite different, the Chimera and Taurox look like their part of the same army by virtue of their similar colour schemes.
Imperator Guides and Grumpy Guardsman each have great tactics articles on the Chimera. I plan on using this as a “meltavets” Chimera with a squad of veterans and two meltaguns that can can fire out of the top hatch. It could also be an effective mobile command vehicle with a company command squad or platoon command squad inside with an officer, vox-caster and couple of special weapons like meltaguns or plasma guns.
I bought this as part of my big $120 order to get the Web Exclusive Space Marine Captain. The Taurox is a new vehicle for the Astra Militarum that isn’t getting a lot of love. I was looking forward to building and painting it during my vacation a couple of months ago.
I’m was agonizing over whether I want to play it as a regular Taurox or a Taurox Prime, and after fielding it once as a Prime, I’ve decided to make it a regular Taurox.
As a regular Astra Militarum Taurox, it’s a cheap transport with the ability to transport a 10-model squad. It also comes with twin-Iinked autocannons. However, it has no fire points which is a bit of a drag, and it lacks the Chimera’s capacity to add a couple independent characters and also lacks the chimera’s special rule of mobile command vehicle, so I won’t be placing a command squad in it. Imperator Guides has a really good blog post talking about the Taurox.
For only 30 more points, I can upgrade it to a Taurox Prime. That adds a nifty battle cannon and it becomes a fast vehicle which can move 12″ per turn and fire both weapons. However, it can only be taken by Militarum Tempestus Scions, which I find very expensive to field.
Construction
Since I bought this vehicle new, it started as merely a collection of sprues.
Collection of sprues that would become a Taurox
I spent a lot of time making a detailed interior. I probably shouldn’t have bothered because it wound up being completely enclosed and hidden anyways.
Taurox under construction
It was a fun model to build. The instructions were clear and
Its first iteration was as a Taurox Prime with the gatling gun.
Taurox Prime with Gatling Gun
As I discovered in the battle against Andrew, the Taurox Prime didn’t do much and neither did the mandatory Scions that had to go with them. So, I converted it to a regular Astra Militarum Taurox.
Astra Militarum Taurox with Twin-Linked AutocannonsTaurox “Lechon”. Front View.Taurox “Lechon”. Front/side View.Taurox “Lechon”. Back View.Taurox “Lechon”. Side View.Taurox “Lechon” with Chimera “Dauntless”
Why did I call it “Lechon”? Well, Lechon means Roast Pig in Spanish and many spanish-based languages, including Tagalog. And apparently, it’s also the national dish of the Philippines! Many early reviews referred to the Taurox as a “Spider-Pig”. And, when I played Pokémon W2, I started with a Tepig which I named Lechon.
I’m finally getting through my backlog of vehicles and able to share some finished pictures.
The first tank I recently completed was a Space Marine Vindicator. Imperial Fists are considered to be siege masters, so the Vindicator seems thematically like the most appropriate tank for them to start with.
The Vindicator is a brutal tank overall. It is aHeavy Supportoption for 125 points and has AV 13 11 10 and BS 4. . This tank is based on the Rhino chassis but replaces the transport capacity with a ridiculously devastating Demolisher Cannon. That cannon is ordnance and has a rather limited range of only 24″, but is S 10 and has AP 2! In my battle with Andrew about two months ago, he used a Vindicator to vaporize a whole squad of my guardsmen with a single shot!
I got this particular model from eBay. I like to think I got a pretty good deal on it. It was primed black, but I could see that there were some traces of blue on the bottom. It’s an older version of the model, which I don’t mind at all. It doesn’t have the dozer-blade/siege shield, which would be thematically appropriate, but I decided to save some points and go without it.
Vindicator model as shipped from eBay
I started by priming the whole tank skull white, and then did a dirty base coat of Averland Sunset. I highlighted the black and metal parts, but unfortunately some wound up on the yellow. Those are hard to clean up!
Base colours applied to the Space Marine Vindicator
After reviewing the codex, I realized that smoke launchers, smoke light and a storm bolter are included in the 125 points. I thought it would be useful to have the pintle-mounted weapon, and since it was already included, I decided to add it. I had to make some modifications to the tank commander. It was surprisingly hard to cut off the pewter arm, but I think the final product looks convincing.
Space Marine Vindiciator, now with pintle-mounted storm bolter
As I mentioned earlier, covering dark spots with yellow was tricky. It took several coats of Yriel Yellow to get a nice even colour, but I’m pretty happy with the end product.
Side view of my Imperial Fists Space Marine Vindicator Tank
I like how many of the paint features turned out. The leadbelcher metallic really shines nicely and gives it an industrial feel. There were other parts I highlighted with Averland Sunset and then covered with Auric Armour Gold, and it looks really sharp, shiny, and golden.
The wooden boxes in the back look pretty effective too.
Rear view of my Imperial Fists Space Marine Vindicator Tank
Front view of my Imperial Fists Space Marine Vindicator Tank
Why did I name it “Subtlety”? Well, it’s meant to be ironic. A bright yellow tank with a monstrously large gun is probably the most unsubtle thing imaginable.
My bright yellow tank with a huge cannon is ironically named “Subtlety”
Omnissiah be praised! Bless these machine spirits!!
And I probably should have stopped there until I finished my backlog which now includes about 25 infantry and these two tanks. But no, I made one more purchase…
eBay lot of 3 incomplete tanks, a Chimera, Basilisk and Hellhound
The lot consisted of parts for 3 Imperial Guard tanks: A Chimera, a Hellhound, and a Basilisk. I thought it was too good a lot to let go.
I’m looking forward to having a heavily mechanized army now. When it’s all assembled, I’ll have the following vehicles:
As I mentioned in this post, I clamored together $120 worth of online purchases so that I could get the Limited Edition Web Exclusive Space Marine Captain as a free bonus.
Packaging
I didn’t want to make an Ultramarine Captain, I wanted to make a Imperial Fists Captain! He would fill a needed HQ slot for my Imperial Fists army.
I started by painting his parts in the sprue.
Space Marine Captain’s parts still on the sprue
I like that he came with a storm bolter. It’s a versatile weapon and still allows him to charge the same turn as firing. The power fist is good, but I wanted something more iconic. For the game Warhammer 40,000, I thought it was fitting that the Space Marine Captain carry a Warhammer! Fortunately, a Stormtrooper model I bought on eBay had been modified to carry a Thunder Hammer. That model can’t carry it in-game, so I removed it and gave it to the Captain.
I also switched out the head it came with for a space marine sergeant head. I figured he should be yelling and not so stoic.
Almost completed Imperial Fists Space Marine Captain
I’m really happy with how he turned out, especially the cape.
Imperial Fists Space Marine Captain: Left view
Imperial Fists Space Marine Captain: Front view
Imperial Fists Space Marine Captain: Right view
Imperial Fists Space Marine Captain: Back view
I made use of the power fist that came with the sprue and gave it to the veteran sergeant of my tactical squad.
Veteran sergeant now equipped with a power fist and my Captain
I’m looking forward to having the Captain lead an allied detachment of Space Marines, or as an independent army!
Space Marine Captain leading a small tactical squad of Imperial Fists Marines